RumbleTalk uses cookies to ensure the best user experience on the website and guarantee its flawless performance. By continuing to use this website, you agree to the use of cookies.
Click here to read more about our GDPR overview.
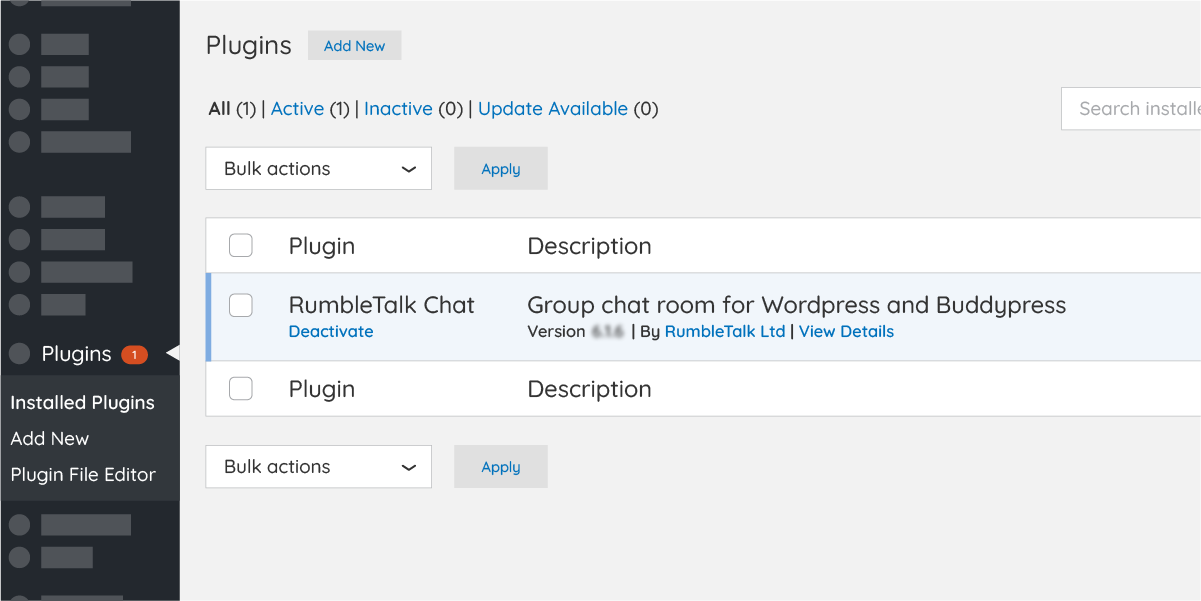

Go to WordPress plugin directory.
Install "RumbleTalk chat" plugin.
Activate your group chat plugin.
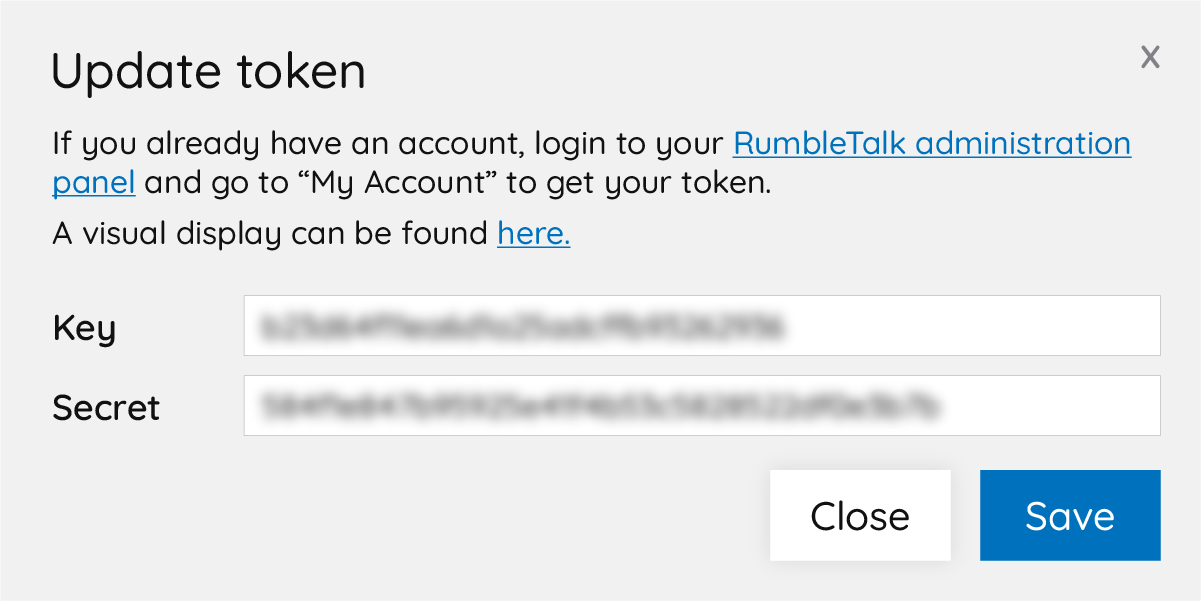
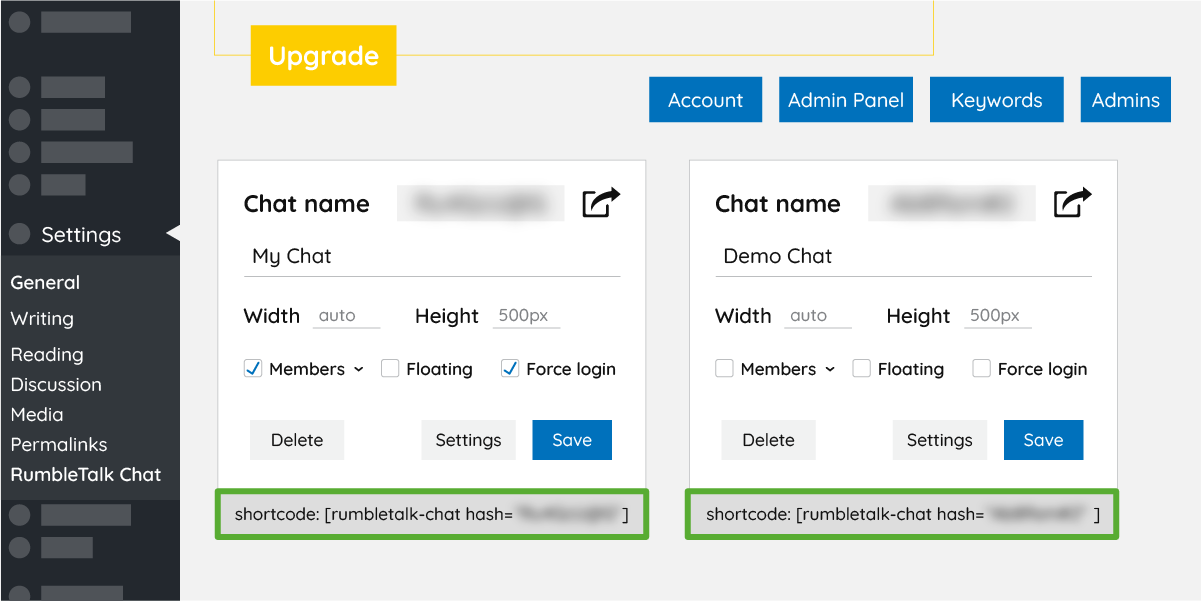
Go to Wordpress Settings, to RumbleTalk Chat and register (email and password).
If you have already an account, click on the "Already have account?". Now add your 2 fields token hyper link and add your account token (two fields that can be found in your admin panel under Account).
After registering, your chat code (hash) will show in the chatroom code field. Your hash is a unique string for every chat room.
* In case you do not get the hash code, you will need to manually register at RumbleTalk Site and get your code.
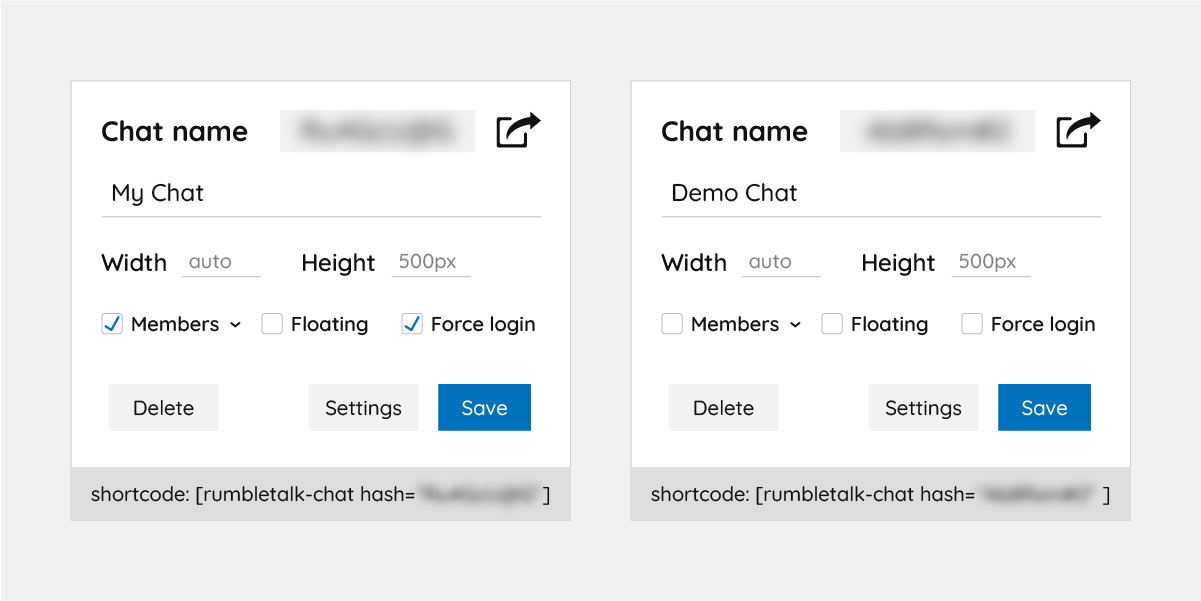
Now for the setting of your chat room plugin.
Add Chat room - create more chat rooms.
Members - Connect your chat to your members users base. This will let your members to auto login to your chat without the need to login.
Size - Control the chat width and height. Note, in some wordpress themes the size of the chat might be smaller or longer than expected.
In that case, see troubleshooting below.
Floating - If you want your chat to show as icon in the lower right corner.
Settings - Change the look & feel of your chat, create moderators, put the chat offline and much more.
Force login - Users are forced to login before entering the chat.
In this step you can control any aspect of your chat. Choose the width and height, the type of chat notmal or floating (toolbar chat). You can integrate your own users base with a click. Finally you can customer the chat behaviour as you like by clicking the setting option.
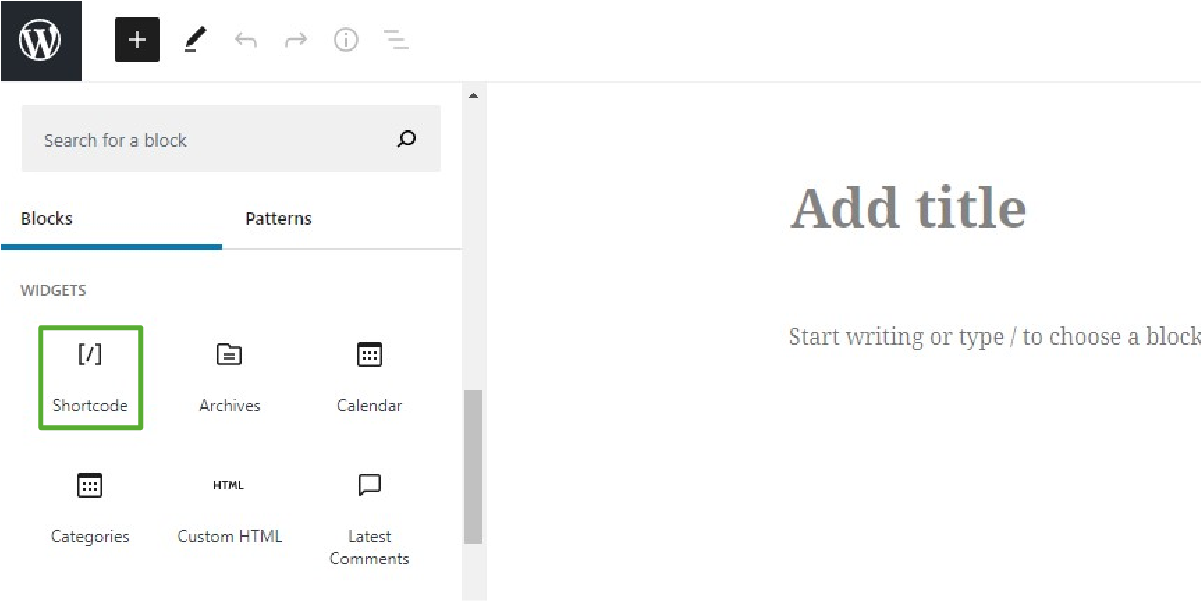
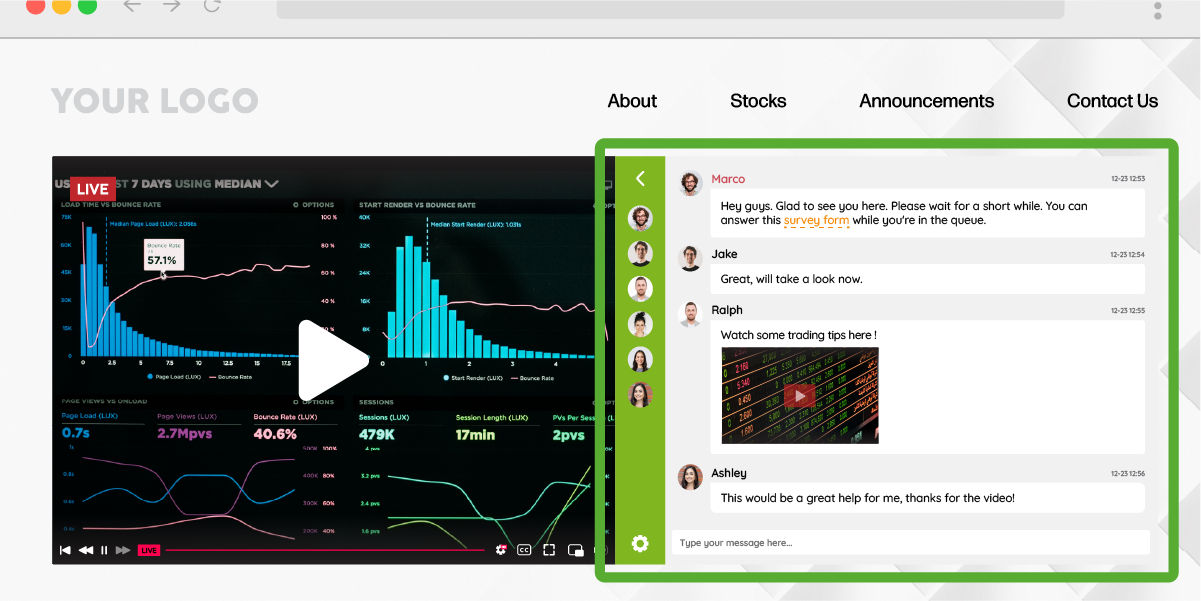
To add RumbleTalk group chat to your site, go to a page or post in your wordpress admin.
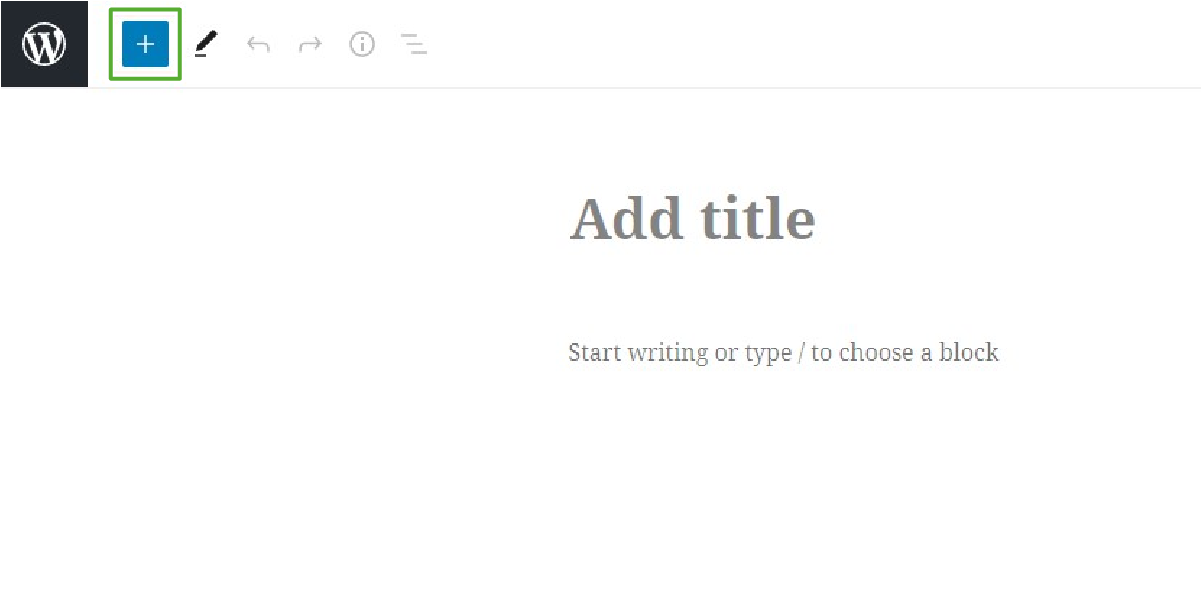
Click the Add Block setting (represented by a blue box with the plus sign).
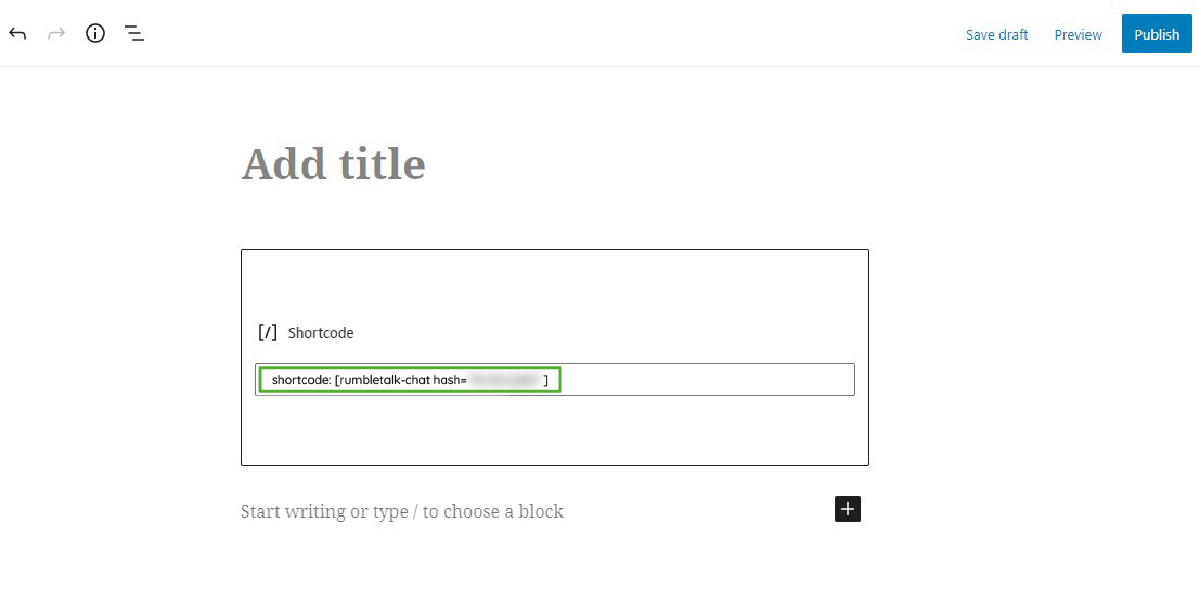
Place a Shortcode block.
Copy your RumbleTalk Unique Chat Code to the shortcode block.
Paste your code to the Shortcode block.
That’s it! Take a look at your new chat.
Go to your website to the page you just added the chat, you should see the chatroom in your page.
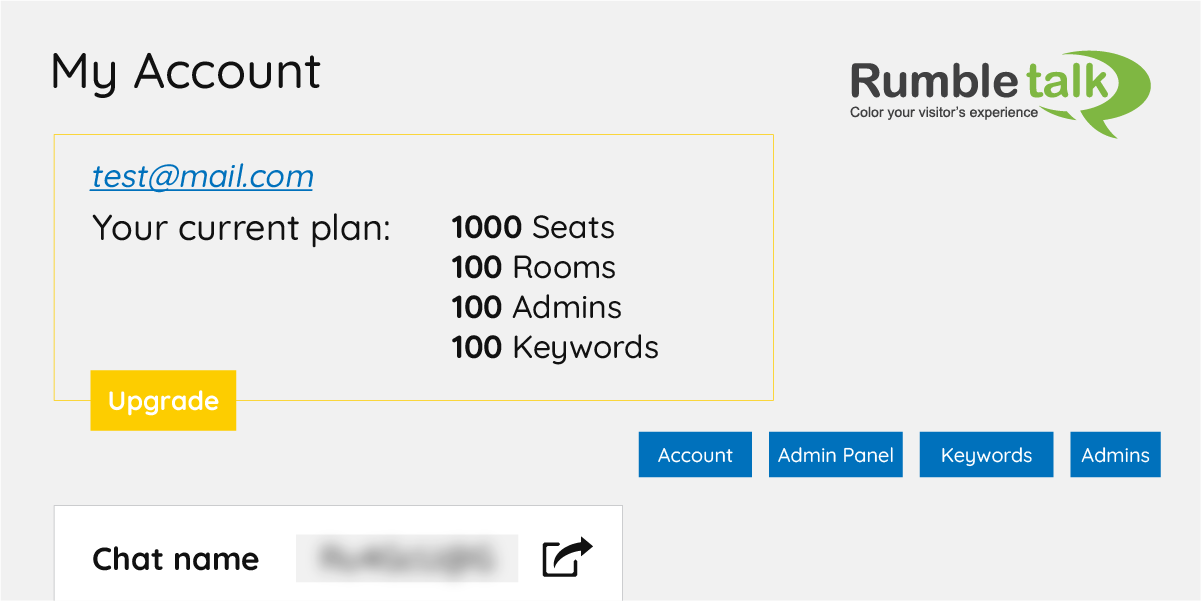
If you could not complete your registration (meaning you have no hash code shown in your plugin settings), you should go to rumbletalk.com.
Sign-in and get your chat code. Than you will return to the plugin go to the "I already have my RumbleTalk Chatroom code" and manually add your chat hash code.
In some wordpress themes there is an issue to control the size of the chat. As elastic chatroom, it will expand to the max size you allocated for it. In case the chat height is too small or too long, you will need to do the following:
<div style="max-width: 600px; height: 500px;">
<div id="rt-17d4adfcb486bf55ea7627a692361510">
<script language="JavaScript" type="text/javascript" src="https://rumbletalk.com/client/?chatcode"></script>
</div>
Advance users: for advance users that wish to add the group chat into every page of the website. There is a possability to add the code a to the footer file of wordpress.
<div style="max-width: 600px; height: 500px;"><div id="rt-17d4adfcb486bf55ea7627a692361510">
<script language="JavaScript" type="text/javascript" src="https://rumbletalk.com/client/?chatcode&1"></script>
</div>
If you want to use your own users base for automatic login. you should make sure your settings is correct. Read more here.